Art has no manual
Creation Process

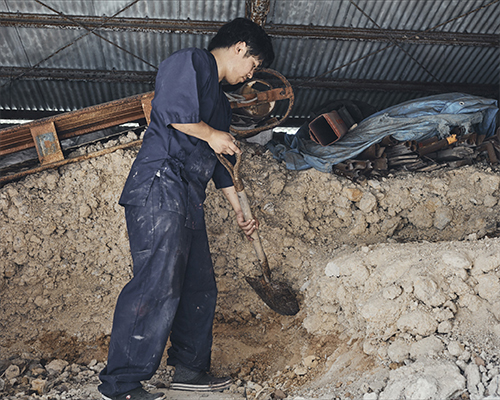
Clay preparation
White clay preserved since the time of Oniwayaki Takatori more than 300 years ago. It is left to soak in water for two to three months and filtered to obtain uniformly fine particles of potter’s clay. The clay is then left to rest for several more months.


Spiral wedging
This kneading process serves to make the hardness of the clay uniform and to remove air from the clay. The gentle action of spiral wedging enables smoother operation of the potter’s wheel.
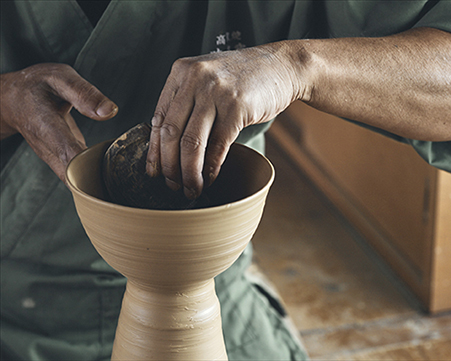

Shaping
This operation is to make the clay thin. The clay is shaped by touching the outside of the piece with a piece of buckskin leather in one hand while touching the inside with a stick-shaped tool called an uchigote (“inner rib” shaping tool).

Kneading
This technique is used when making large works. Clay shaped into long strings is coiled and layered to roughly form the desired shape. The shape is then refined by throwing on a wheel.


Kick wheel
Most of the pottery produced by the Miraku Kiln is made using a kick wheel. A kick wheel is a wheel made of wood that is rotated by the kicking action of the potter. Skill is necessary to maintain stable rotation of the wheel. To perform delicate shaping work with the hands while precisely controlling the kick wheel speed requires a highly developed technique and long experience.

Drying
Once a piece is approximately shaped, it is hardened by placing it upside down and leaving it to dry for a day or two.
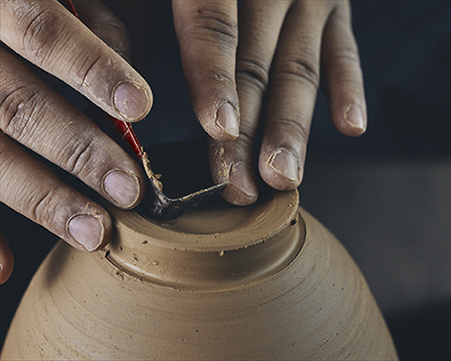
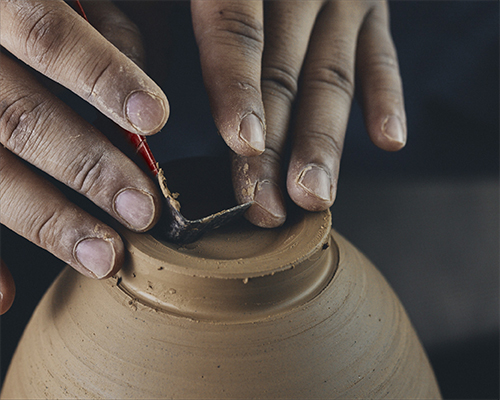
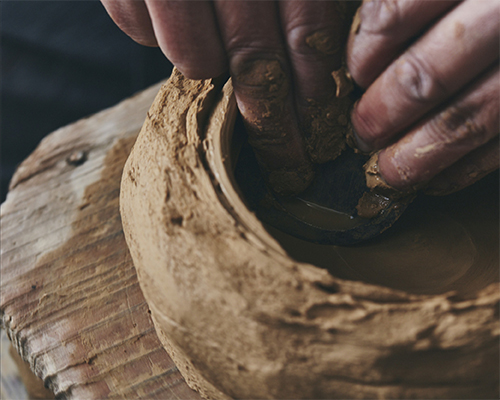
Trimming
This process serves to refine the shape of the dried piece of pottery using a plane and other tools to trim off material.
To avoid damaging the lip, the piece is placed upside down over a cylindrical object called a shitta (“wet stand”) while trimming.
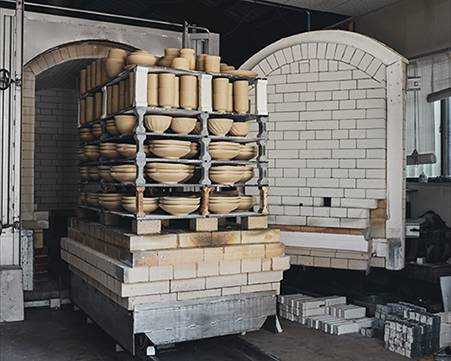

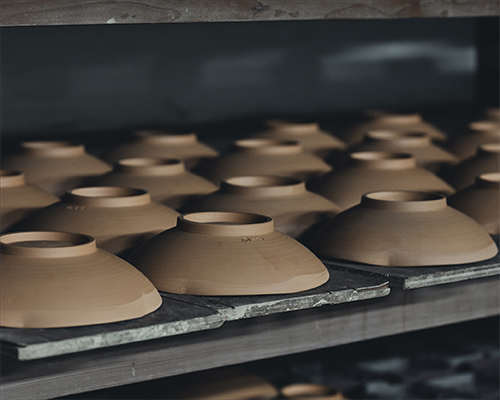
Bisque firing
This process is to fire the dried, trimmed piece of pottery in a kiln at approximately 800℃.
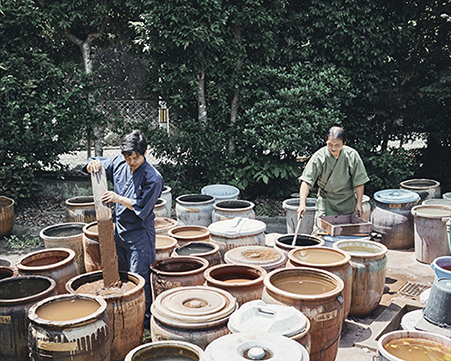
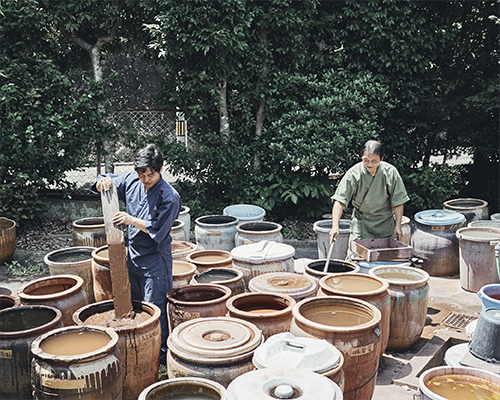
Glaze preparation
All the glazes are made from natural ingredients such as straw ash, wood ash, feldspar, and yamasabi (“mountain rust”). After leaving glaze jars out in the open air to accumulate rainwater, the scum that forms on the surface is removed.

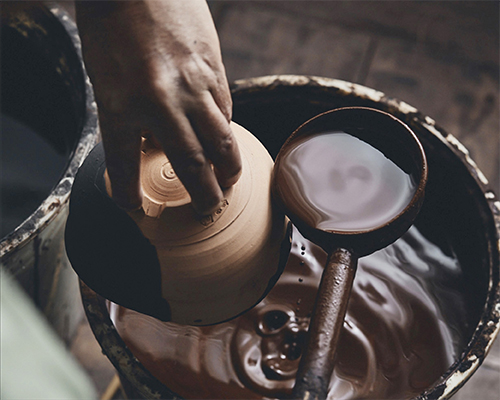
Glaze application
Glaze is basically applied over the piece of pottery using a ladle. Excess glaze is simply left to drip off. If there are two separate colors, the technique of kakewake (“separate glazing”) is used. The boundary between the two colors is drawn with a brush, and ladles are then used to apply each color to the appropriate area of the object.
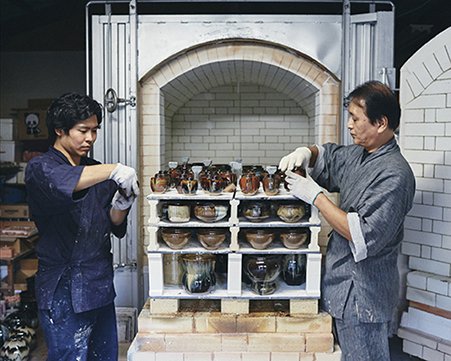
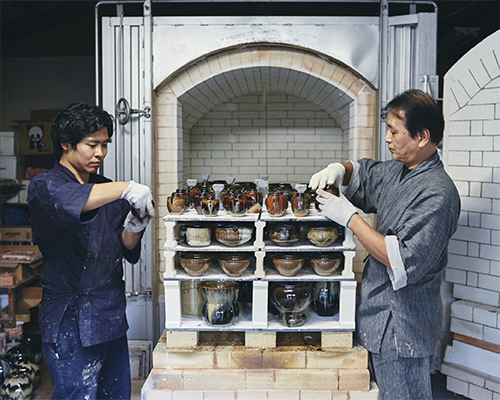
Glaze firing
(kiln loading/unloading)
After applying the glazes, the pieces are left to dry and then fired in the kiln at a temperature of 1,280℃.

